


To improve your recruitment process you first need to understand it. And one of the best ways to do that is to map it out.
A recruitment process flowchart will help you to:
- Visualise the process
- Be very clear on what is happening
- Easily share the process so everyone understands who is doing what
- Help you to analyse your process and improve it
Ok, so you want to map out your recruitment process - where do you start?
In this post, we’ll help you create your own recruitment process flowchart.
Objectives of your flowchart
Creating a recruitment process flowchart is an excellent way of working better with hiring managers and improving your candidate experience.
Flowcharts are great for showing who is responsible for what, and how they fit into the overall goal of the process. By including the hiring manager’s role, you can clearly show them what they’ll need to do - and give them a much better idea of what you’ll be doing.
But you also need to keep track of how each step affects the people you’re trying to hire.
From the moment people first become aware of your company and job they start judging whether it’s worth their time to apply. This assessment continues as they go through your recruitment process. Every interaction they have with you helps to form their overall impression of your company and the role.
Taken all together, these touchpoints form the candidate experience and can have a big impact on whether or not the person will want to work at your company.
Recruitment process steps
Every time you have a new job to fill there are 8 key steps that need to be done:
- Identify what you need
- Plan what you need to do for this specific role
- Write the job description
- Find people to apply for your job
- Review the applications
- Interview and assess people
- Decide who to hire and make an offer
- Onboarding
👉 You can learn more about each step in our post: the 8 steps in every successful recruitment process.
Creating your recruitment process flow diagram
To make it clear who is responsible for what, we’ll use ‘swim lanes’ in our flow diagram. Swimlanes split the diagram into sections - one for each person or team. Tasks are then placed in the lane of the person or team that owns it.
We’ll have one lane for the hiring manager, and one for the recruitment team.
As one of our objectives is to see our candidate touchpoints, we’ve also added a lane for the candidate. This lane will be used to add all of the tasks where the candidate is contacted. Each task will be colour coded so we know if the candidate is in touch with the recruiter or hiring manager.
To get you started, we’ve created a sample recruitment process diagram.
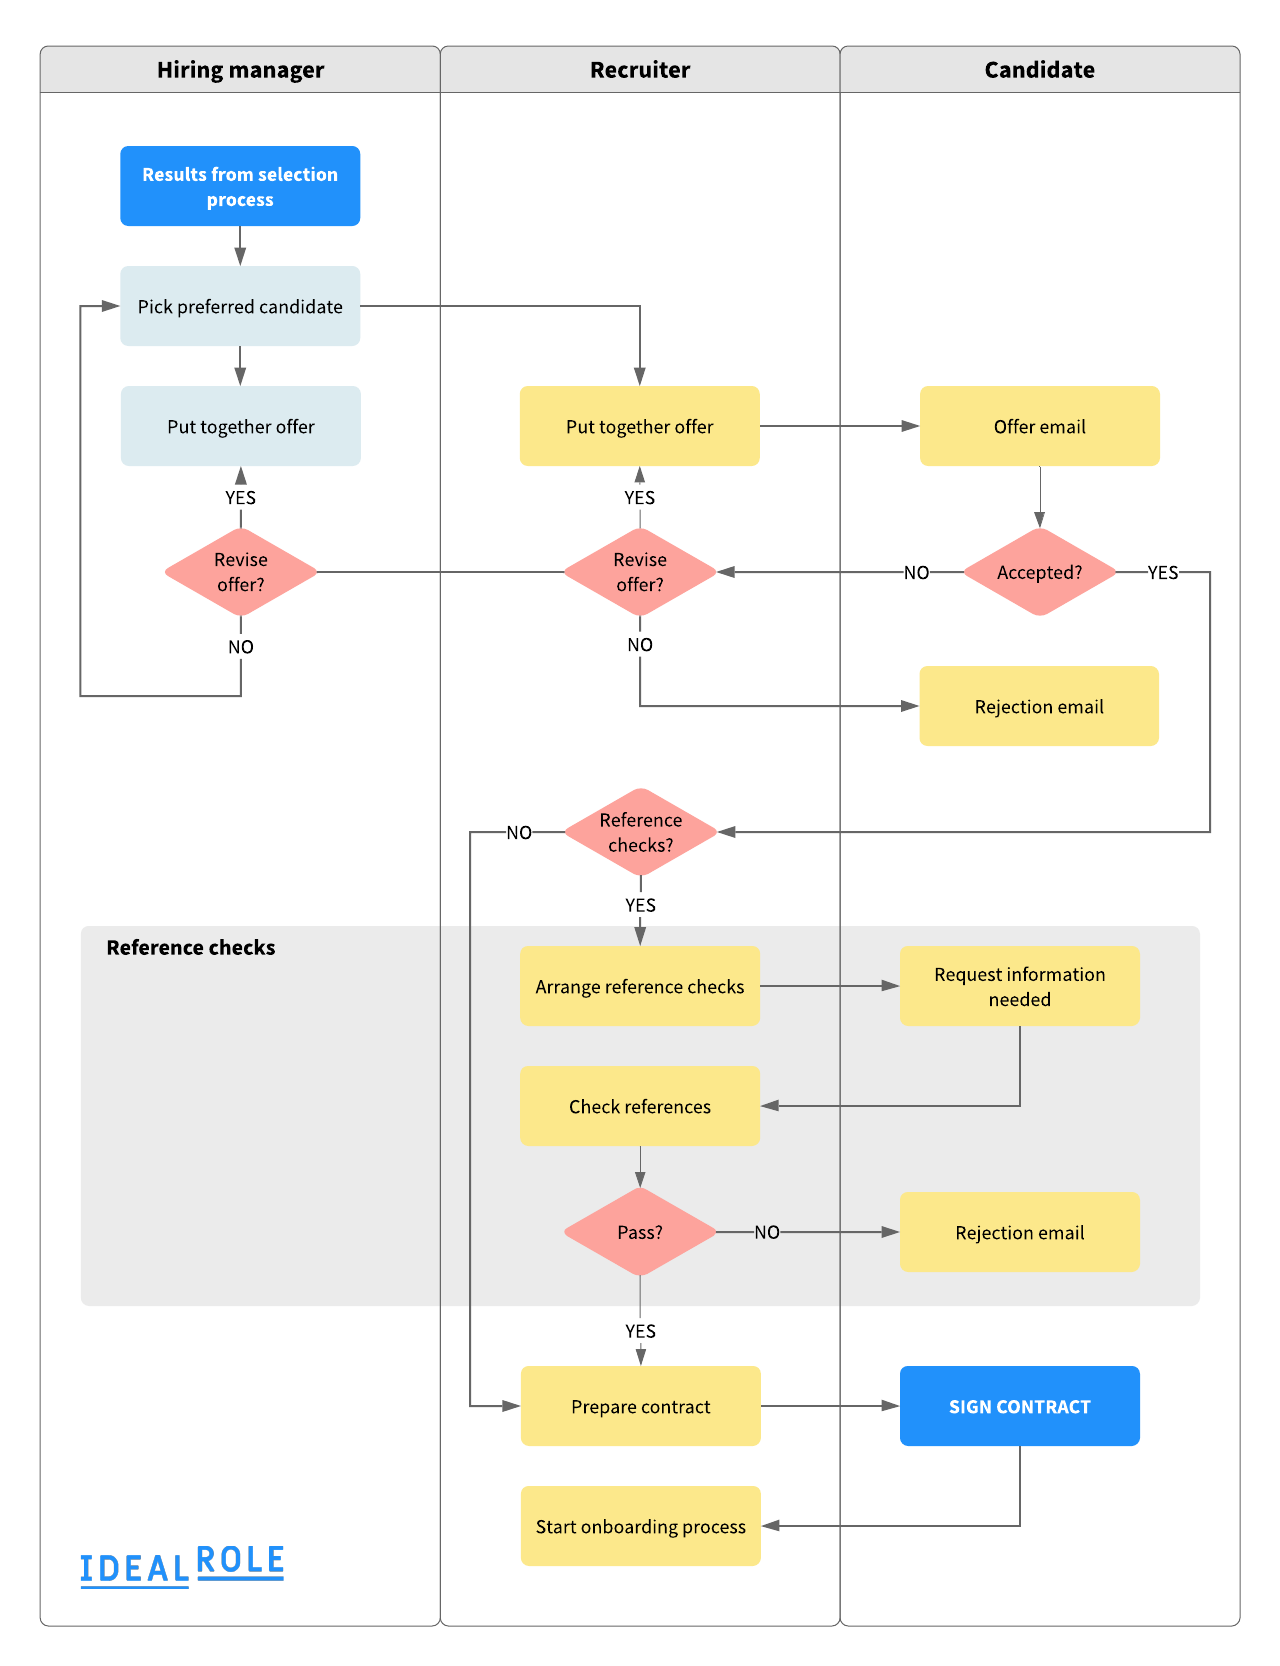
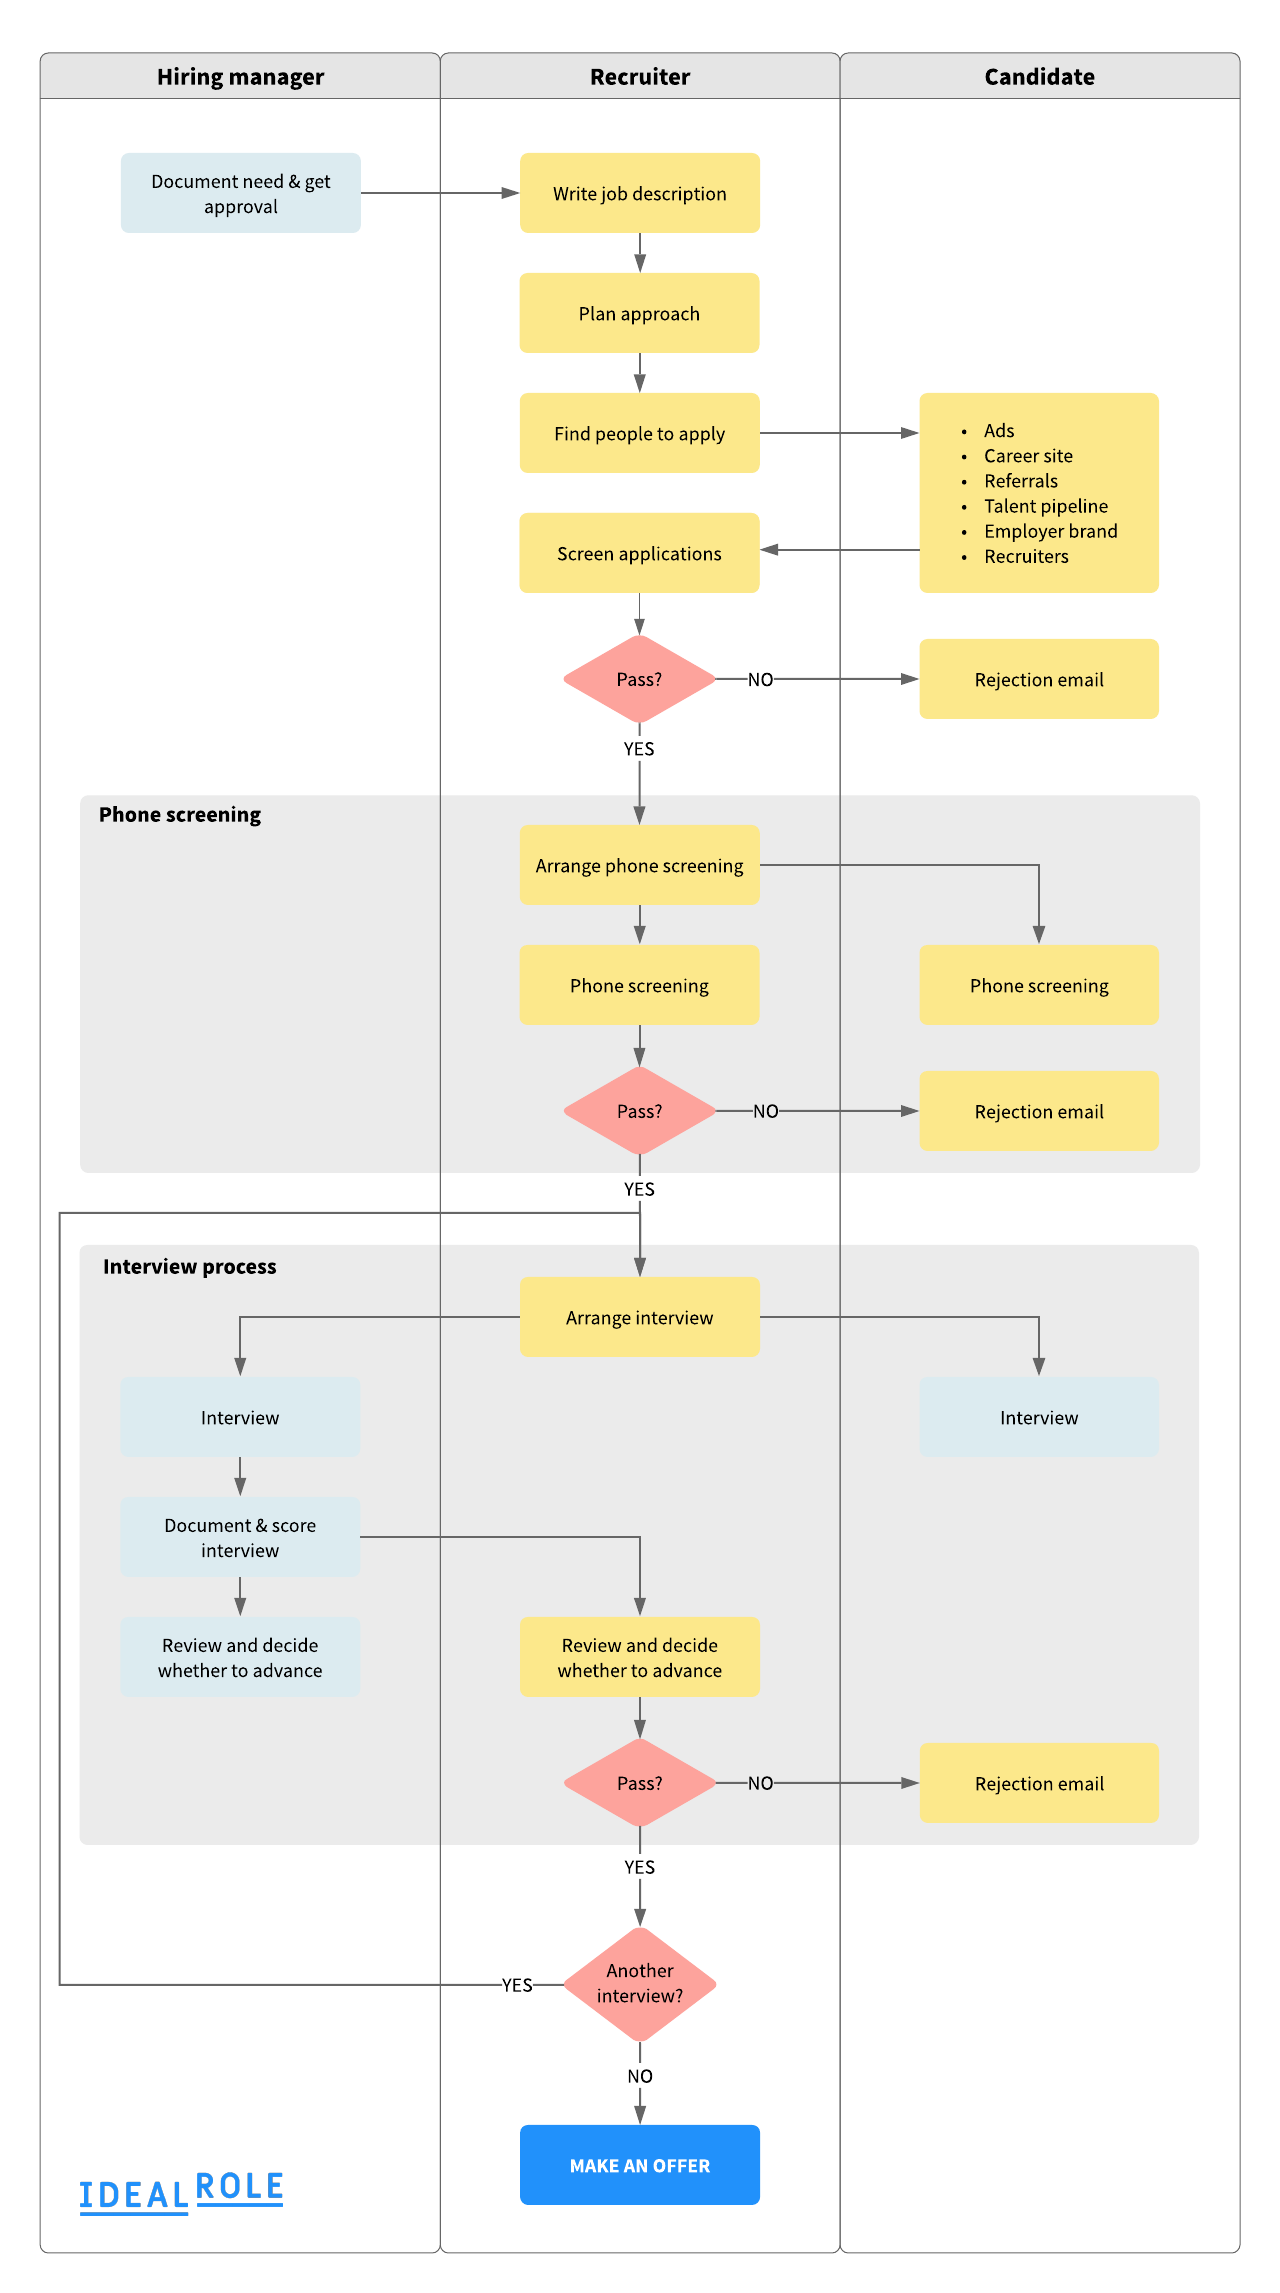
The first one below covers the first 6 steps in the recruitment process. As the offer (step 7) has a lot of different scenarios it’s split out into its own process diagram.
Because onboarding can change depending on the role, person and company, we couldn’t include a general version. But you can use the same format as the other diagrams to make your own.
Recruitment process flow diagram
Recruitment process diagram - Offer step